Quickbooks Interface Back


The Quickbooks interface requires version 07-12-28 or above, Click here to get your updates.
You also need the Bay State Consulting Quickbooks Importer, Clik here to download and install.

You also need to have Quickbooks runing with your company open (if this is a demo or practice run you can open the Quickbooks sample company) open Quickbooks Select File, New Company, Select Leave when the interview starts, Yes to leave the interview, and select Open a sample file, Sample Product based business and select OK. At this point you can minimize quickbooks.

Send Invoices from a single deal
On the Loan Master make sure you have a complete deal with customer name and stock number, select File, export to Quickbooks

You will then see the screen shown below...
This module has three functions, Journal Entry, Invoice, and Bill, the Quickbooks Accounts list is so you can select the Accounts you want to use in Quickbboks for each amount, the vendor list is so you can enter the name of the vendors to be paid.
On this Invoice sample yo do not need to complete the lists, they are used mostly for Journal entries and bills. You have 2 export types, Direct and Wizard, the Wizard should be used to start so you have a chance of making changes, when you choose direct the program will continue on all the way to the data being exported.

 
Click Export, the next few screens will vary depending on if you are in demo mode or have purchased the license for the exporter.
Click ok and close the help screen if they are visible.
The First time you use this feature Quickbooks will display a Certificate message asking for permission to let this interface have access to your Quickbooks Files. If you select yes and give all rights you will not be asked again. If you say no the process will stop and you will have to mannualy change the settings in the Preferences section of the Edit menu, select integrated applications and company preferences. Select Baystate Consulting and Properties, then check all 3 allow boxes and ok twice.
 
 
You should then see the main screen of the Transaction Pro Import Wizard, the wizard allows for changes in configuration but they should not be required since the Loan Master has set up the files to work with the default settings, if the import is successful you should be able to select direct in future exports. Make sure the setting appear like the picture below and select Next.


Once you select Next the Wizard will display the records ready for export, the wizard allows you to delete single records in case you do not wish to export the complete set. Also usefull in case one of the records was entered manualy and you want to avoid entering duplicates.


Now the wizard will show the mapping of the fields in Quickbooks, you can make changes on the Import File Columns
but they should not be needed. the only reason for changes in the mapping is to duplicate or move data from one quickbooks
field to another. Users of Quickbooks 2007 and 2008 need to click Load map and select the invoiceqbook2.dat file (only needed the first time you use it)


After you select next the screen below will show the mapped data in their respective quickbooks columns.


Selecting Next will display the last Wizard Screen, a few more account changes can be made, but in most situations you want to leave the default settings as shown below. Click Finish to begin the import process (Warning this will make permanent changes to your Quickbooks File, make sure you make a backup first).

 
You should see a mesage like the one below, select ok to start the transfer.
 
if the transfer was successfull you will see a message like this one.
 
 
You can check your Invoice in Quickbooks, it should list all the items exported.


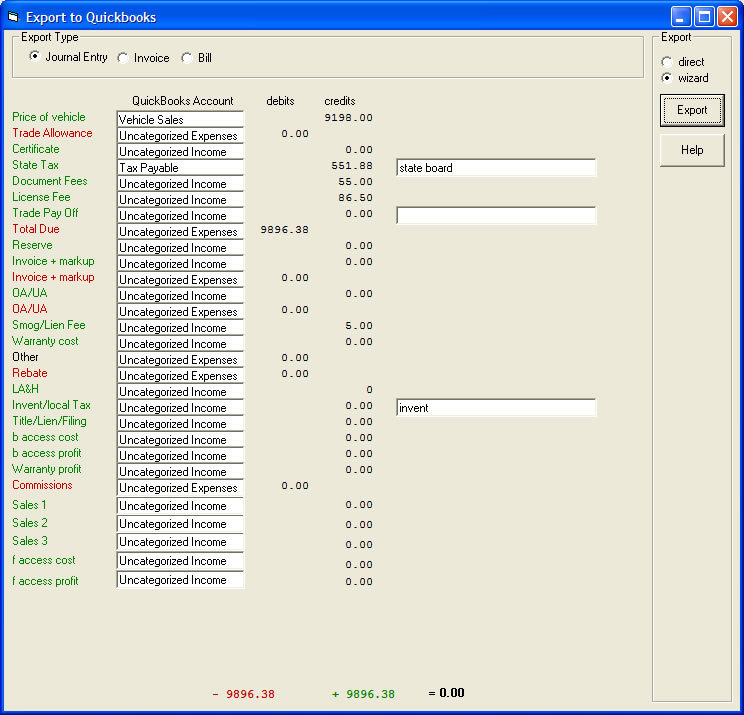
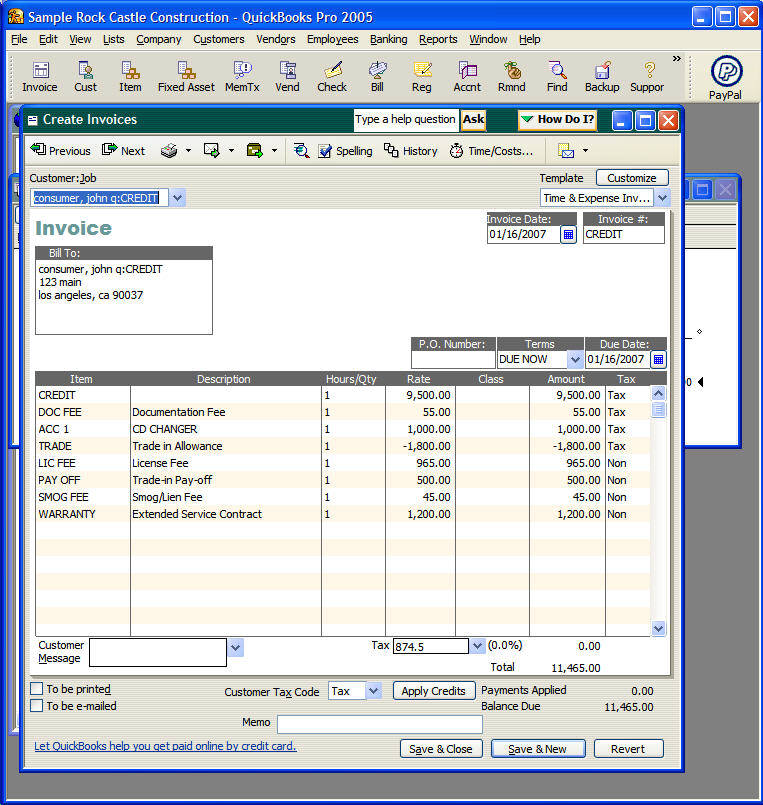
It is important to note that when you export Invoices and bills your customer,job and any payee vendor or item gets exported too, but when you do a journal entry all accounts, and vendors must already be in Quickbooks.
Journal Entries and Bills follow the same steps as above exept for the initial selection of Journal or Bill instead of invoice.
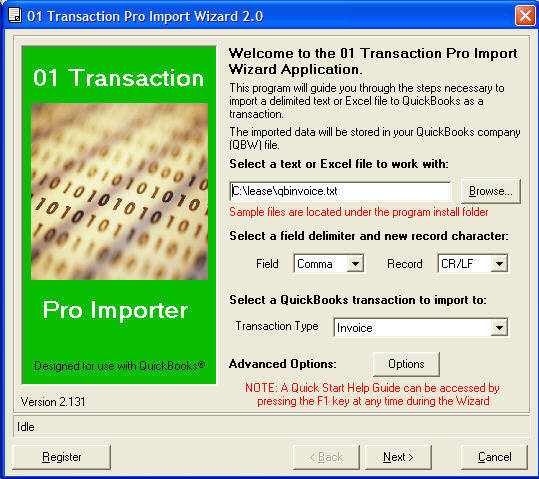
The Moth to Date Report module also Includes an export option that uses the same wizard, but selects a date range of transactions,simply select your date range, and select [QB INVOIC] on the first drop down and then select the CSV button, it will start the same wizard shown above.
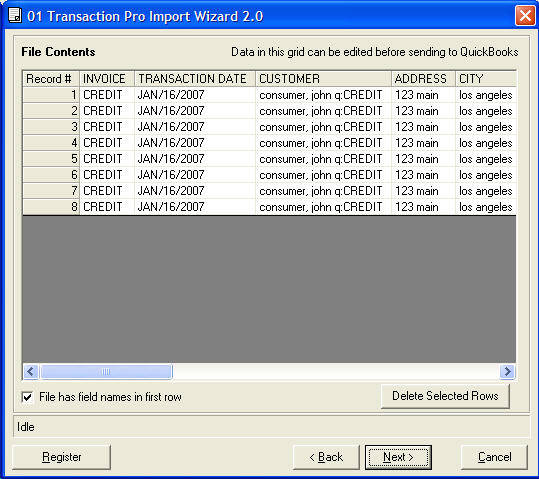
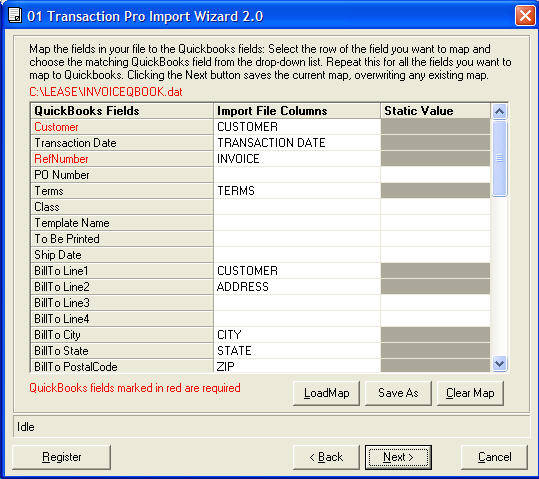
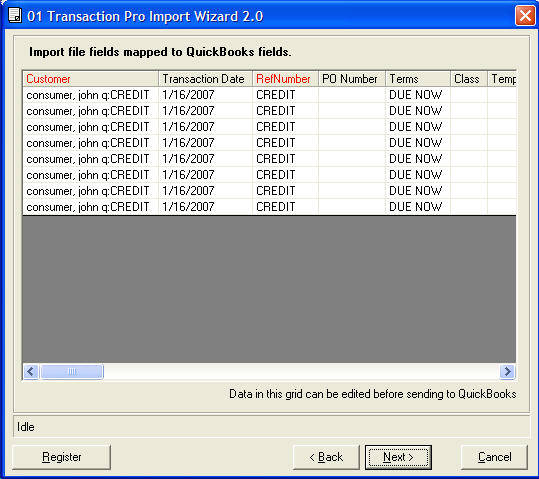
Error messages may appear if the data you are attempting to export is incomplete, invalid or causes a problem in quickbooks, in that case the invoice will not be exported and you can step through the wizard again and look at the tables of data for the problem, you can also close the wizard and return to Loan Master to make changes to the deal itself.


© Copyright 2011 leasemaster.com. All rights reserved.